Cute Cartoon Nail Charms: Get Professional Results
Step-by-step guide to apply 20-piece cute cartoon nail charms for salon-quality manicures at home, plus tips, tools, and aftercare.
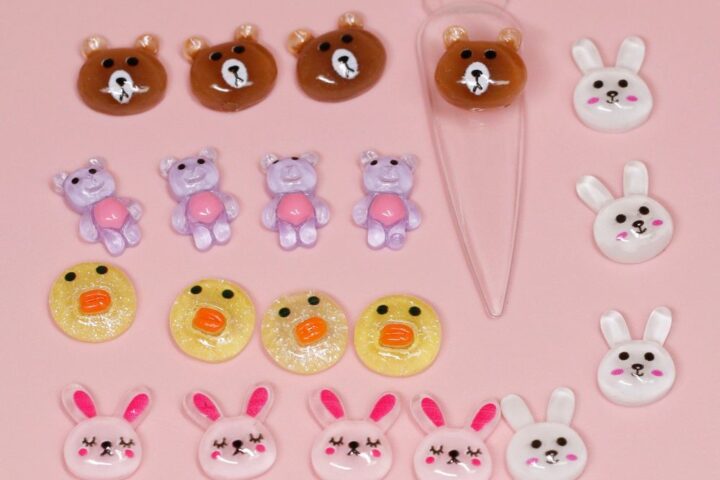
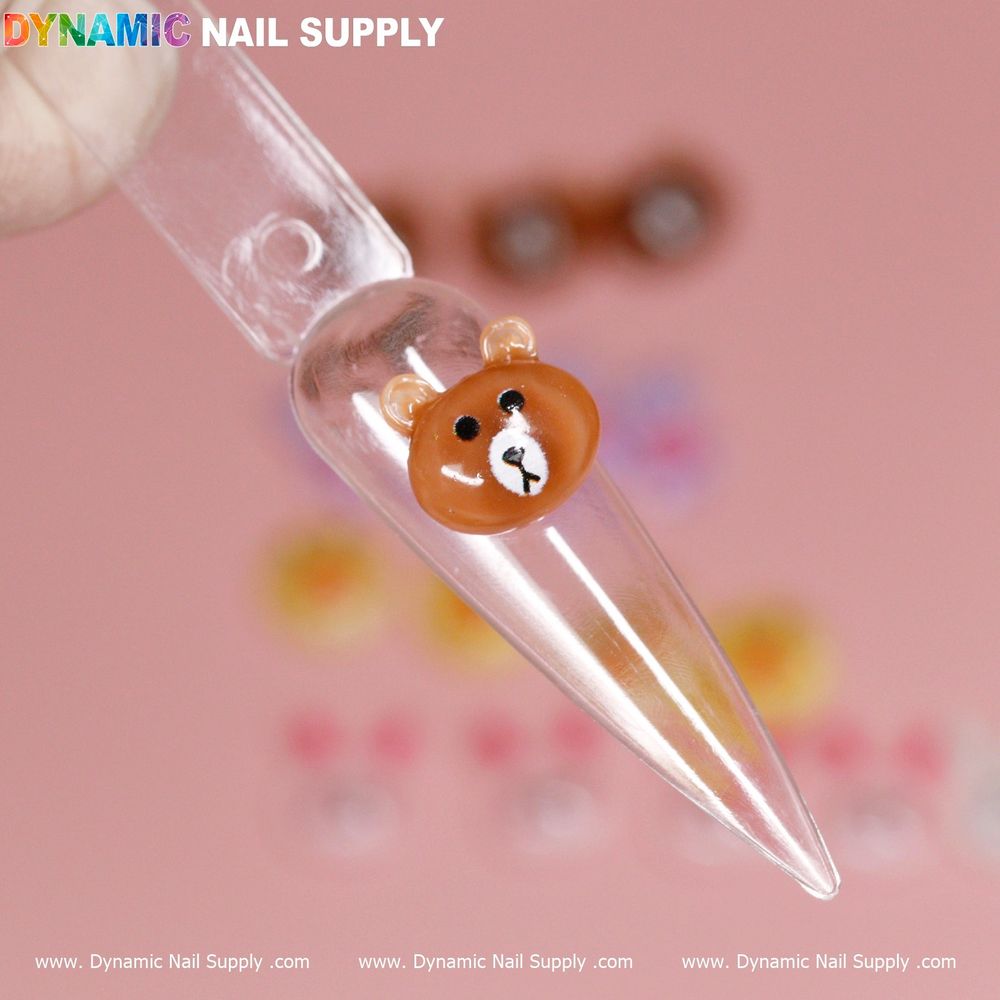
Small, playful nail accents can elevate a simple manicure into a memorable look. Cute cartoon nail charms—like the brown and cony characters in a 20-piece set—offer instant personality for short or long nails. With the right prep and placement, you can achieve professional, long-lasting results without leaving home.
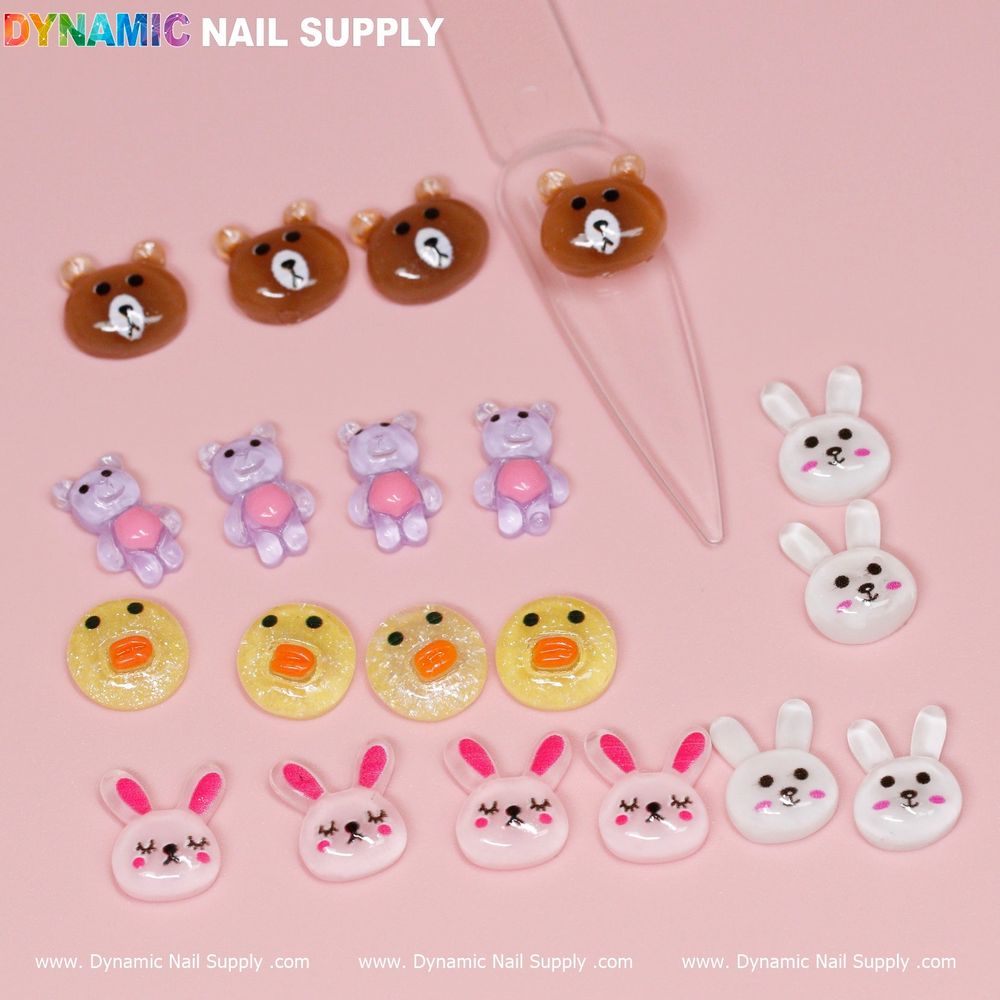
What’s in the pack and why it works
The kit includes 20 pieces of character charms featuring brown and cony designs, sized and styled for nail art. A single bag gives you options for full-set accents, mixed-finger looks, or occasional feature nails—perfect for experimenting with placement and symmetry. The set retails for about $8.00, making it an affordable way to try themed nail art.
If you want the exact set used in these steps, check out these cute nail charms.
Tools and products you’ll need
Gather these essentials before you start to speed the process and improve adhesion:
- Cleanser or isopropyl alcohol for degreasing the nail plate
- Base coat and top coat (gel or regular depending on your lamp and preference)
- Nail glue or builder gel for stronger hold
- Tweezers or a wax picker for precise placement
- Cuticle pusher, nail file, and buffer
- Optional: LED/UV lamp if using gel products
Step-by-step: salon-style application at home
- Prep the nail: Remove old polish, push back cuticles, and lightly buff the surface. Clean each nail with a lint-free wipe and a nail cleanser or alcohol to remove oils.
- Apply base: Use a thin base coat and cure if using gel. A smooth, tack-free base helps charms sit flat and reduces lift later.
- Plan placement: Lay out the charm positions on both hands before gluing—mirror the look or intentionally alternate for a playful effect. For small hands or short nails, choose one focal nail per hand.
- Attach the charm: For temporary wear, a drop of nail glue placed on the back of the charm and then pressed onto the nail works well. For the most secure hold, use a small bead of builder gel, position the charm, and cure under an LED/UV lamp.
- Seal the edges: Carefully apply top coat around (not over bulky charms) to create a protective border. If charms are very raised, encapsulate with builder gel for a smoother finish and extra durability.
- Finishing touches: Remove any adhesive residue from the skin and reapply top coat to adjacent nails for a cohesive shine.
Design ideas to try in salon or at home
- Feature-nail focus: Place the character charm on the ring finger and keep other nails in a coordinating solid shade.
- Mix-and-match: Alternate one brown and one cony charm across hands for a playful duo effect.
- Accent with glitter: Use a star-shaped glitter or subtle shimmer around the charm to add dimension without overpowering the character.
- Negative space framing: Paint a minimal stripe or crescent where the charm will sit so the charm becomes the centerpiece of a modern, clean design.
Care, longevity, and safe removal
To make charms last, avoid heavy scrubbing and wear protective gloves while doing chores. Reapply top coat around the base every few days to reinforce the seal. When it’s time to remove, do not pry charms off—soak the nail in appropriate remover for your adhesive type or gently file the topcoat until the charm can be loosened without damaging the natural nail.
If you’re using strong adhesives or gel, follow product instructions for safe removal and consider professional assistance to avoid nail injury.
Who should use these charms?
These charms suit nail artists, hobbyists, and clients seeking cute, character-driven manicures. They’re great for themed events, children’s parties, or anyone who loves kawaii-style details. Salon technicians can incorporate them as quick accent pieces during express services, and DIYers will appreciate the ease of use and playful options the 20-piece set offers.
Final tips and quick checklist
- Always test placement before gluing.
- Work one nail at a time for the cleanest finish.
- Use tweezers for precise positioning and to avoid fingerprints on the charm.
- Keep a small file and alcohol wipes on hand for cleanup and adjustments.
These small decorations can transform a plain manicure into a conversation piece. Whether you’re working in a salon or doing nails at home, following preparation, placement, and sealing steps will deliver polished, professional results with charming character accents. Sold by Dynamic Nail Supply, the 20-piece pack gives you room to experiment and create playful looks that stand out.