3D Nail Charm Silicone Mold: Hearts & Stars Review
Feature-focused review of a clear, reusable silicone mold for creating mixed-size heart and star 3D nail charms.
Small accents can change a manicure from ordinary to eye-catching — and silicone molds are a fast way to add consistent 3D decorations. This review-style overview breaks down the practical features of a clear, reusable mold set designed to produce mixed-size hearts and stars for nail art and small crafts.
What’s in the kit and who makes it
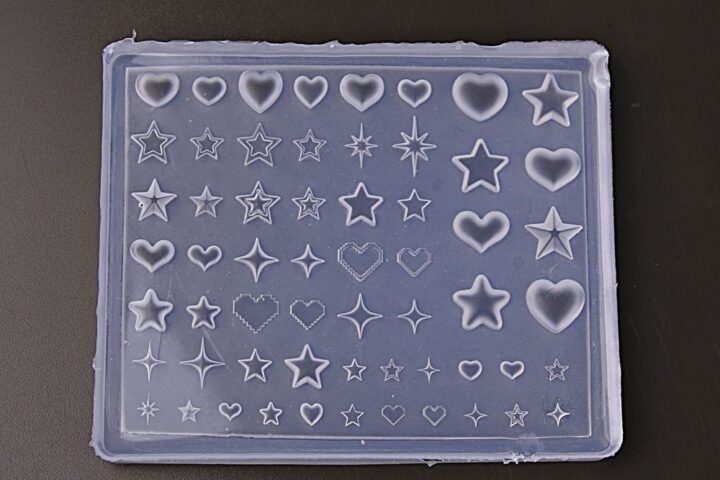
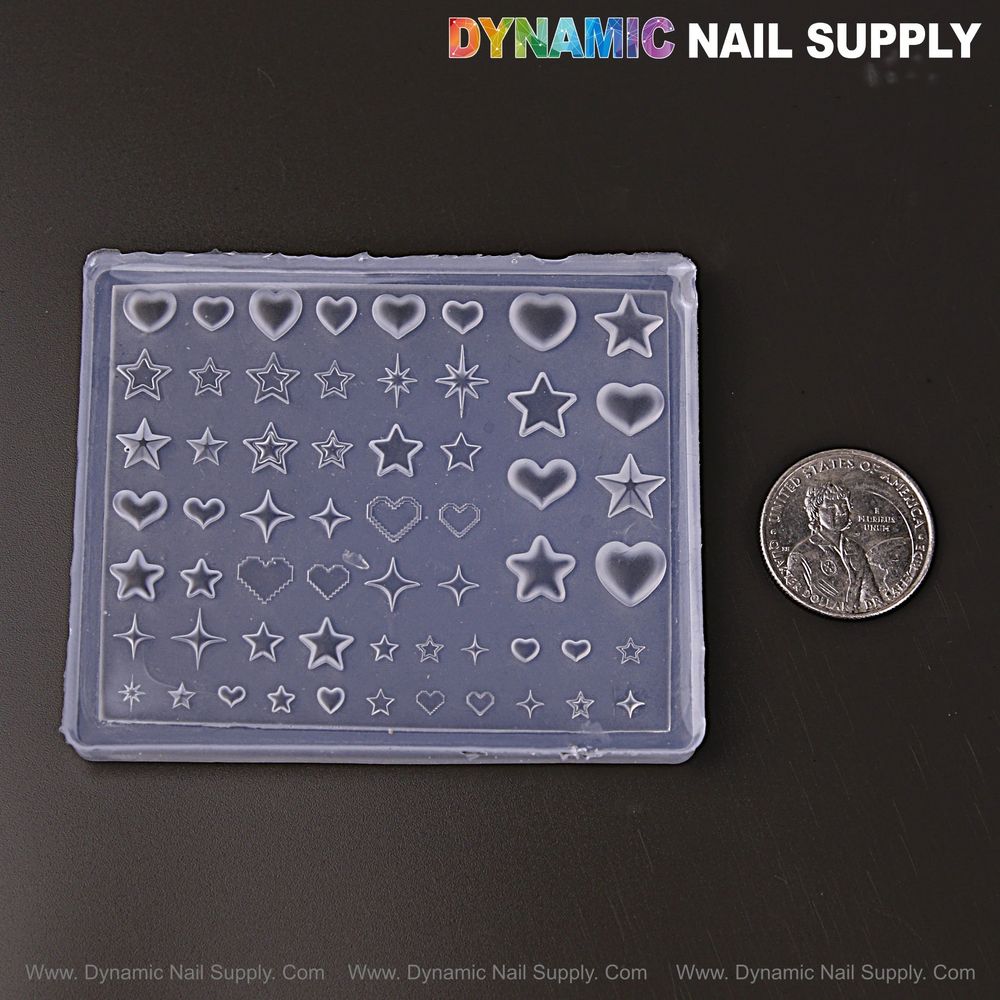
The product is a single clear silicone nail art mold shaped with multiple heart and star cavities in varying sizes. It’s sold as a reusable tool intended for crafting embossed charms with gel, acrylic, resin and other compatible materials. The listing is carried by Dynamic Nail Supply and the piece is presented as a lightweight, entry-level accessory for both hobbyists and technicians.
Material and build: flexible, thin, and washable
The mold is made from soft, clear silicone that emphasizes elasticity. That flexibility helps with demolding delicate shapes without tearing and allows the mold to capture fine details. Because it’s thin and pliable, the mold is easy to handle when filling small cavities and quick to clean after use. The manufacturer highlights that it can be washed and reused, which is useful when you produce multiple charms in a single session.
Design and detail: mixed sizes for layered looks
What sets this item apart is the variety of cavity sizes for both hearts and stars, so you can mix tiny accents with slightly larger pieces on one manicure. The patterns are intended to deliver crisp embossed edges once cured, enabling layered compositions—think a tiny star perched on a glitter base or a heart framed with rhinestones. If you like building coordinated sets (seasonal, themed, or size-graded), the mixed-size layout saves time compared with single-shape templates.
Compatibility: what materials work here
The mold is presented as multi-material compatible. Examples of materials compatible with the cavities include sculpting gel, solid gel, gel polish, acrylic, and UV resin. That flexibility means you can experiment with different finishes—opaque, translucent, chrome powders, or glitter—without needing a separate mold for each medium. For those who want to expand beyond nails, the same cavities can also be used for small resin decorations for phone cases, jewelry, or scrapbooks.
How the process works — a practical sequence
- Prepare the mold by removing dust or debris with a lint-free wipe or cleaner and ensure it is dry.
- Fill the chosen cavity with your selected material; use a small tool to push product into fine recesses.
- Level the surface with a scraper or card, then cure according to your product’s instructions.
- Gently flex the mold from the edges to release the charm and use tweezers for handling small pieces.
- Attach charms to the nail with appropriate adhesive and seal edges with top coat as needed.
For a direct look at product details and ordering, check this silicone charm mold in the product listing.
Practical tips from the specifications
- Work on a clean surface: Keep the mold free of dust before filling to avoid trapped particles in fine details.
- Use fine tools: A dotting tool or carving pen helps push material into small cavities for sharper reliefs.
- Flex don’t pull: Bend the silicone to remove charms rather than tugging them, which reduces distortion risk.
- Store flat and cool: Keeping the mold away from direct sunlight preserves flexibility over repeated uses.
Who should consider this mold
This mold suits a range of users: beginners wanting predictable, repeatable shapes without hand-sculpting; salon techs who need small decorative elements on demand; and crafters who add tiny charms to resin or mixed-media projects. Because the cavities include several sizes, it’s particularly helpful for creators who design matching manicures across multiple nail lengths or who layer accents for depth.
Care and safe handling notes
Being washable and reusable makes maintenance straightforward: rinse the mold with mild soap and water or wipe with alcohol to remove residue, then let it dry completely before the next use. Avoid sharp objects that could puncture the silicone, and keep the mold flat to maintain its shape. Follow curing times recommended by the material manufacturer rather than relying on a fixed time, since curing varies by product chemistry and lamp strength.
Final thoughts
For a compact, low-cost tool that adds consistent hearts and stars to nail designs, this clear silicone mold delivers on basic expectations: it’s flexible, detailed, and compatible with multiple materials. Priced affordably, it can be a useful addition to a technician’s kit or a DIY crafter’s supply drawer. If you want predictable, repeatable 3D charms without hand-carving, this silicone charm mold is worth considering.